How to convert a PNG to JPG and shrink the file
Last updated: 9 November 2026.
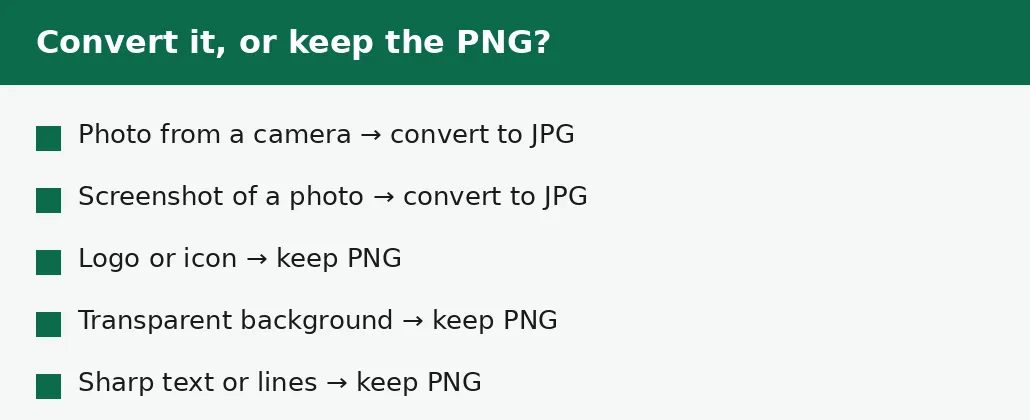
Converting a PNG photo to JPG usually shrinks it to about a tenth of its size, because JPG stores photographs far more efficiently than PNG does. The trade is small and specific: JPG cannot do transparency, so a PNG with a transparent background will come out with a solid background instead, and JPG's compression is lossy, so fine detail softens very slightly at low quality settings. For a photograph — a picture from a camera or phone, a screenshot of a photo, a scanned image — PNG to JPG is almost always the right move. For a logo, an icon or a graphic with sharp edges and transparency, keep the PNG.
Why the PNG is so big
PNG stores every pixel exactly, with no loss at all — which is wonderful for a logo and wasteful for a photograph. A photo's pixels change gradually from one to the next, and PNG records each one faithfully, so a 4000-pixel-wide photo can easily be 10 to 12 MB as a PNG. JPG is built for exactly this kind of picture: it stores the gradual changes efficiently and discards fine detail the eye will not miss, so the same photo at good quality is about 1 to 2 MB.
That tenfold difference is why PNG photos cause problems: they breach email attachment limits, they make web pages slow, and they fill phone storage. The photo itself is not the problem — the format is. Converting to JPG fixes the format without changing the picture in any way you will notice.
How to convert a PNG to JPG
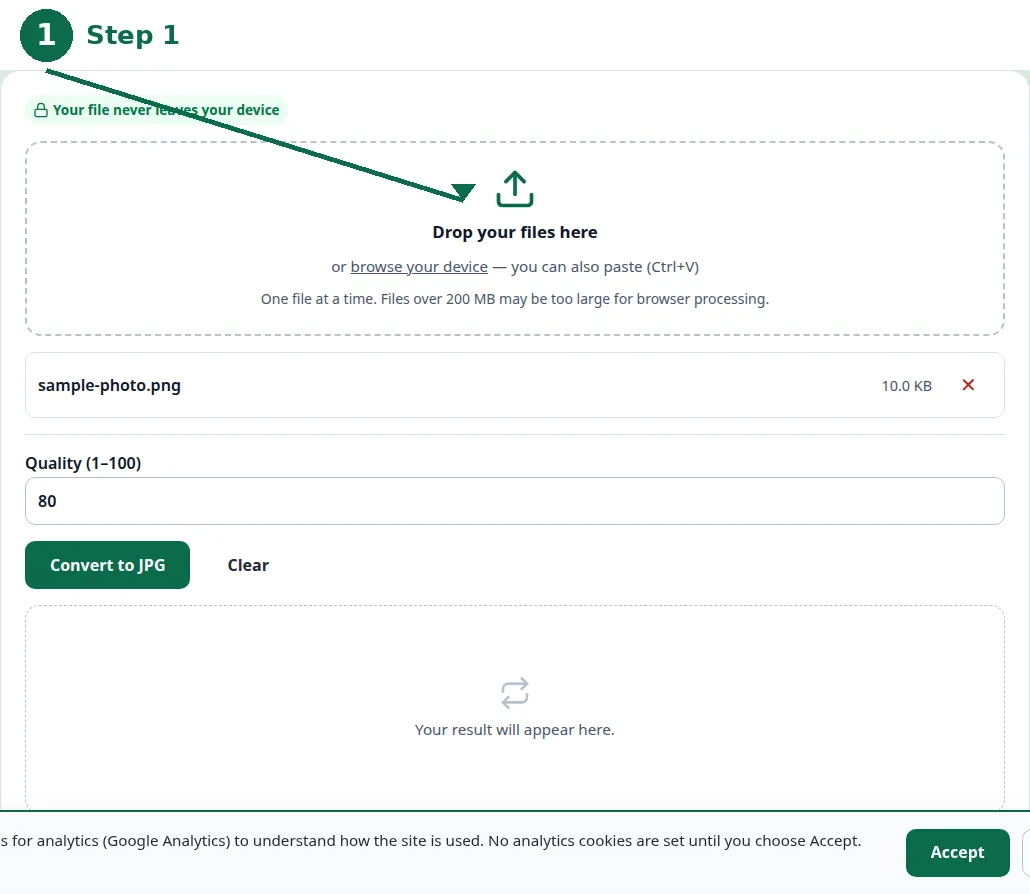
The conversion is three steps, and the only decision is the quality setting. Higher quality keeps more detail and makes a bigger file; lower quality shrinks the file and softens fine detail. For most photos, 85 to 90 is the sweet spot: the picture looks sharp, and the file is a fraction of the PNG.
Convert from the original PNG, not from a JPG you made earlier: converting a JPG to a JPG throws away detail from an already-reduced picture. And keep the PNG until you have checked the JPG — if the quality setting was too low, the fix is to convert again from the original, not from the soft JPG.
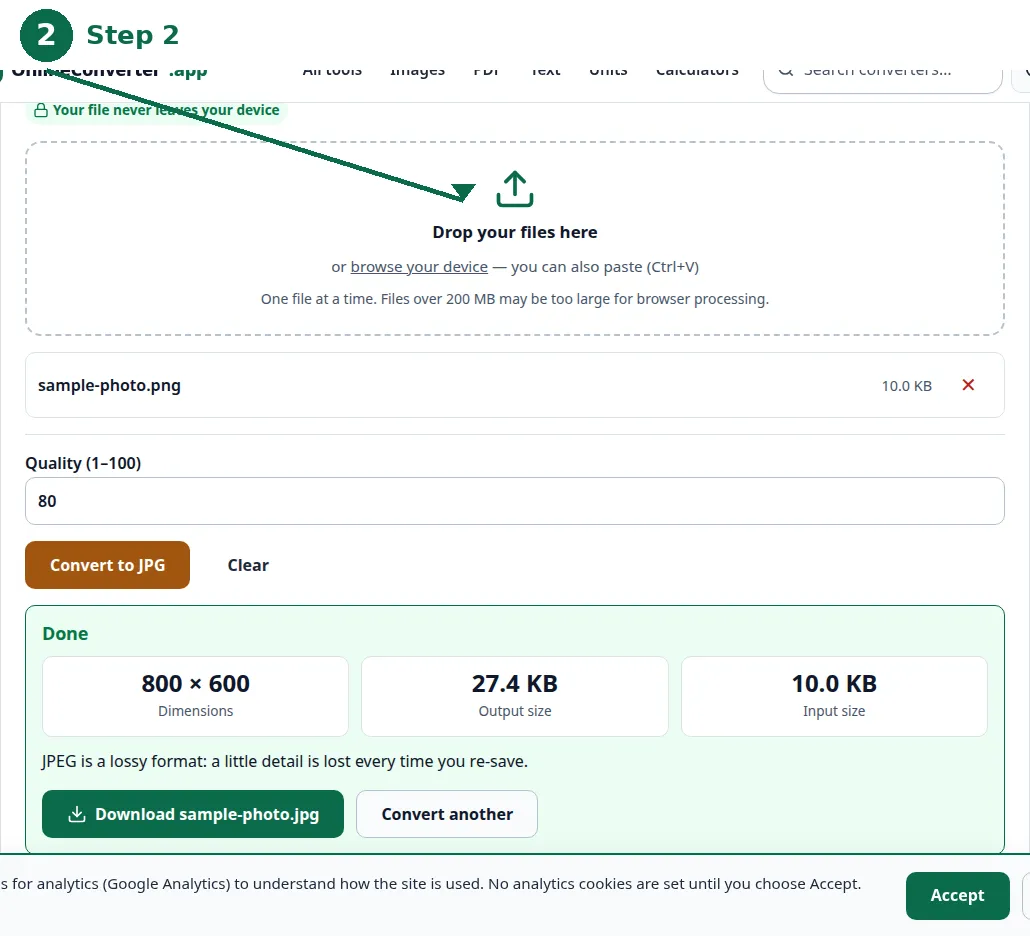
- Step 1 — Open the PNG to JPG tool and choose your PNG file.
- Step 2 — Pick a quality setting: 85 to 90 for a photo you will look at closely.
- Step 3 — Click Convert and download the JPG.
- Step 4 — Open the JPG at full size and check the faces, text and fine detail before you use it.
Quality: which setting to pick
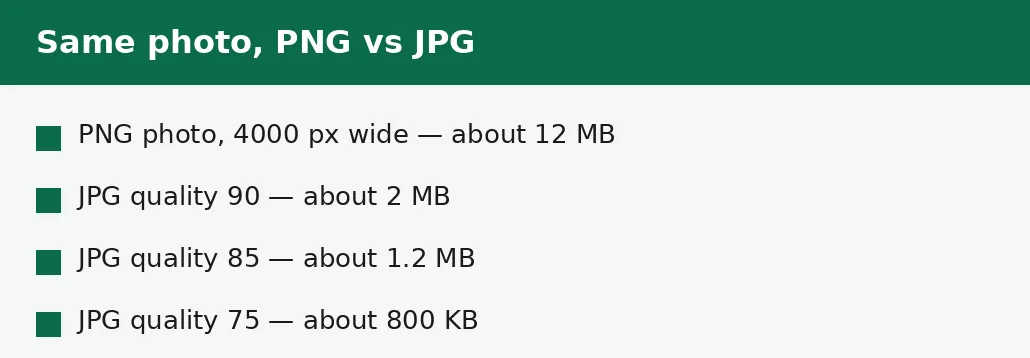
Quality 90 is the safe choice for a photo that matters — a picture for print, a portfolio image, a photo you will zoom into. The file is still far smaller than the PNG, and the difference from the original is effectively invisible. Quality 85 is the practical choice for the web and for sharing: a little smaller again, and still sharp on any screen.
Below 75, the savings get small and the damage gets visible: blocky patches in smooth areas like skies, smearing around fine detail, text that looks slightly out of focus. Quality 75 is the floor for anything you care about, and below 60 is only for thumbnails and previews where nobody will look closely. If you are unsure, convert at 90 and check the file size — if it is still too big, step down to 85 and look again, always from the original PNG.
| Quality | File size (12 MB PNG) | Looks like | Use for |
|---|---|---|---|
| 90 | About 2 MB | Sharp; same as the PNG | Print, portfolio, anything important |
| 85 | About 1.2 MB | Sharp on any screen | Web pages, sharing, email |
| 75 | About 800 KB | Good; slight softening | Social posts, forms, uploads |
| 60 | About 500 KB | Visibly softer | Thumbnails and previews only |
Transparency: the one thing JPG cannot do
PNG supports transparency — pixels that let whatever is behind the image show through — and JPG does not. A logo on a transparent background, a sticker, a product cut-out: converted to JPG, the transparent parts become a solid colour, usually white or black, and the image looks wrong on any background that is not that colour.
So before you convert, look at the PNG: does it have a transparent background, or is it a photo with a full background of its own? A photo always has a background, so it converts cleanly. A logo, icon or graphic with see-through parts does not, and should stay PNG — or go to WebP, which keeps transparency and is smaller than PNG. The WebP vs PNG vs JPG guide covers that choice in full.
How much smaller will it be?
For a photograph, expect roughly a tenth of the PNG's size at quality 85 to 90 — a 12 MB PNG photo becomes about 1 to 2 MB as a JPG. The exact figure depends on the picture: a photo with large smooth areas like sky or a plain wall compresses further than a photo full of fine detail like grass or fabric, because smooth areas are cheap for JPG to store.
For a graphic — a chart, a screenshot of text, a drawing with flat colours — the saving is smaller, and the quality cost is higher: JPG softens sharp edges, so text and lines can look fuzzy. Those images are the ones to keep as PNG, or to convert to WebP instead. The rule is simple: photos convert, graphics stay.
The mistakes that cost quality
The most common mistake is converting a JPG to a JPG: taking a photo that is already a JPG, converting it again at a lower quality, and wondering why it looks worse. Every JPG save throws away detail, so a second save throws away detail from an already-reduced picture. Convert once, from the PNG, and stop.
The second mistake is converting a transparent PNG and only noticing the white background after the image is already on a website. Check for transparency before you convert — open the PNG and look at its edges. And the third mistake is deleting the PNG before checking the JPG: if the quality setting was too low, only the original can be converted again properly.
Troubleshooting
Why is my JPG barely smaller than the PNG?
The image is probably a graphic — a chart, text, flat colours — not a photo. JPG's advantage is on photographs; graphics compress poorly as JPG and can even look worse. Keep graphics as PNG, or try WebP.
Why does my converted JPG have a white background?
The PNG had a transparent background, and JPG cannot store transparency — the see-through parts became solid white. Logos and cut-outs should stay PNG.
Why does my JPG look blurry?
The quality setting was too low, or the JPG was made from an already-converted JPG. Convert again from the original PNG at quality 85 or 90, and check the result at full size.
Common questions
Will converting PNG to JPG lose quality?
Very slightly, at good quality settings — quality 85 to 90 keeps a photo looking sharp. The loss is only visible if you look very closely or use a low quality setting.
Can I convert JPG back to PNG to restore quality?
No. Converting back makes a bigger file with exactly the same picture — the detail discarded when the JPG was made cannot be recovered.
What quality setting should I use?
90 for anything important, 85 for the web and sharing, 75 as the floor. Below 60 is only for thumbnails.
Does PNG to JPG work for screenshots?
For screenshots of photos, yes. For screenshots of text or interfaces, the JPG softens sharp edges — keep those as PNG, or use WebP.
Is my image uploaded anywhere when I convert it?
No. Conversion runs entirely in your browser. Nothing is sent to a server, there is no account, and closing the tab clears your file from memory.
Should I keep the PNG after converting?
Yes, until you have checked the JPG at full size. If the quality setting was too low, only the original PNG can be converted again properly.
Summary
A PNG photo converts to JPG at about a tenth of its size, and at quality 85 to 90 the picture stays sharp. The only exceptions are transparency — JPG cannot do it — and graphics with sharp edges, which should stay PNG. Convert once, from the original PNG, and check the result at full size before you delete anything.